How an Oil Tank is Replaced: A Step-by-Step Guide
Oil tank replacement
is a necessary step for homeowners and businesses aiming to ensure the safety, efficiency, and compliance of their fuel storage systems. Whether prompted by aging infrastructure, environmental regulations, or the need for increased capacity, the process of replacing an oil tank requires careful consideration and planning. From assessing the condition of the existing tank to selecting suitable replacement options and managing installation logistics, navigating this endeavor demands attention to detail and adherence to industry best practices.
Replacing an oil tank is an important process that ensures the safe and efficient storage of heating oil. Whether you're upgrading to a new tank or replacing an old and worn-out one, understanding the steps involved in the replacement process can help you navigate the project effectively. In this article, we will provide a comprehensive step-by-step guide on how an oil tank is replaced, ensuring a smooth and successful installation.
Step 1: Assessment and Planning
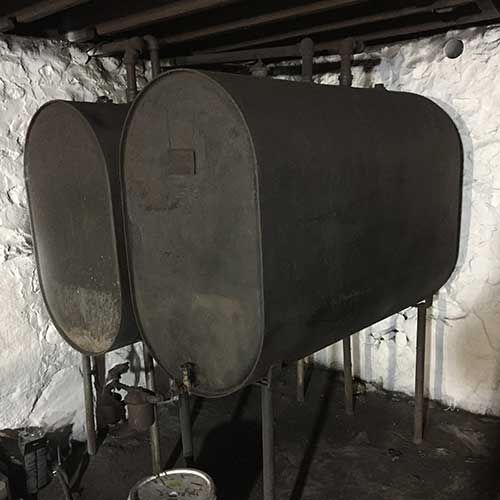
The first step in replacing an oil tank is to assess the condition of the existing tank and plan for the replacement. An experienced oil tank professional will inspect the tank for signs of corrosion, leaks, or other damage. They will also evaluate the location of the tank and ensure compliance with local regulations and codes. Based on their assessment, they will determine the appropriate size and type of tank for your specific needs.
Step 2: Drain and Clean the Tank
Before removing the old oil tank, it needs to be properly drained and cleaned. A licensed technician will pump out the remaining oil and transfer it to a temporary storage container. They will also remove any sludge or sediment from the bottom of the tank. Cleaning the tank ensures that no contaminants or debris are transferred to the new tank during installation.
Step 3: Disconnect the Tank
Once the tank is drained and cleaned, the next step is to disconnect it from the heating system. This involves shutting off the fuel supply line and disconnecting the pipes, fittings, and electrical connections. It's crucial to follow proper safety procedures and use appropriate tools to prevent any accidents or spills during this step.
Step 4: Remove the Old Tank
With the tank disconnected, it can now be safely removed. Depending on the size and location of the tank, this may involve using heavy-duty equipment such as a crane or lifting straps. The tank will be carefully lifted and transported to a designated area for proper disposal or recycling. It's important to comply with local regulations regarding the disposal of old oil tanks to ensure environmental safety.
Get a free quote
Oil Tank Replacement Springfield MA
Step 5: Prepare the Site
After the old tank is removed, the site needs to be prepared for the installation of the new tank. This involves inspecting the foundation or base where the tank will be placed. If any repairs or modifications are needed, such as leveling the ground or reinforcing the foundation, they will be done at this stage. Proper preparation of the site ensures a stable and secure installation.
When it comes to replacing your oil tank, assigning the task to a trustworthy and experienced company is really important. You want to make sure that the company you are hiring for the job has all it takes.